
Dylan House
How to build a remodel vision board that your contractor can actually price
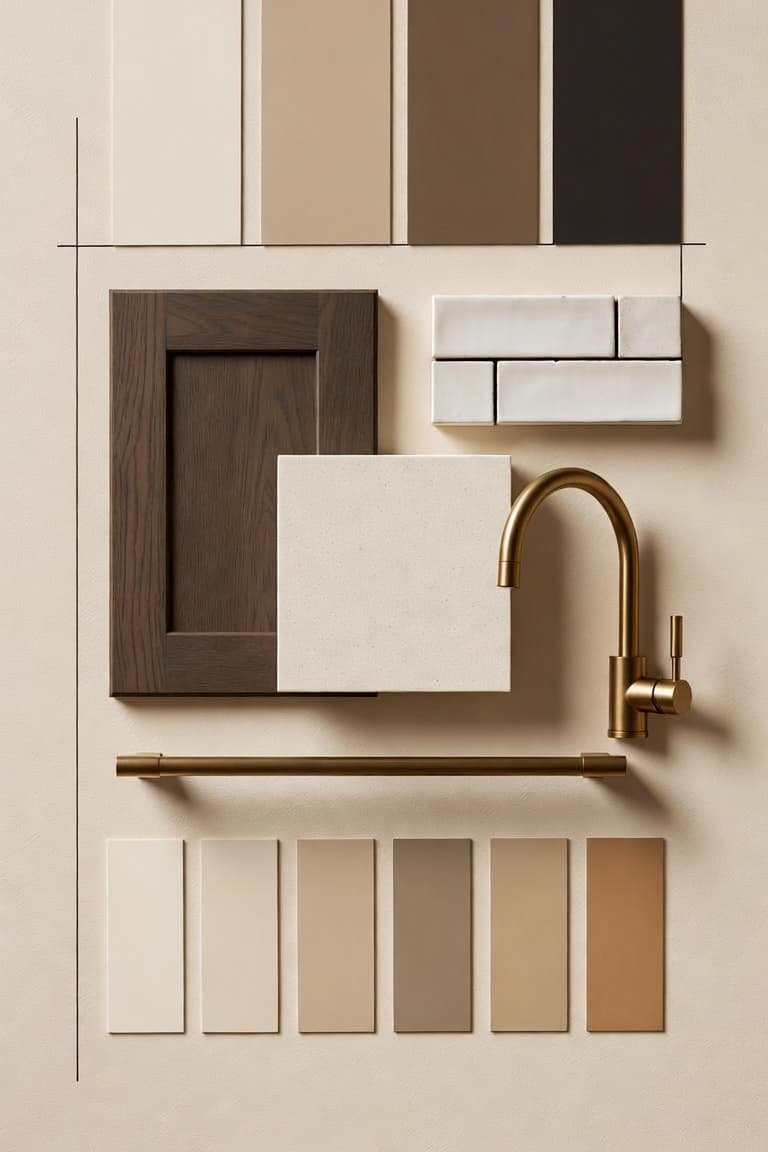
Most homeowners start a remodel the same way: open Pinterest, save forty kitchens that don’t agree with each other, and hope a contractor can read their mind. I’ve sat across the table from that folder. It’s not a plan. It’s a scrapbook with good intentions.
A remodel vision board is the filter between “I like pretty pictures” and “here’s what we’re building.” Done right, it tells your design/build team how the space should look and feel—and it seeds the finish decisions that become allowances and material specs. This guide walks through what that board is, how to build one without drowning in options, how to coordinate finishes so the house feels intentional, and where to research ideas. At the end you’ll find our downloadable finish checklists for kitchens, baths, and general remodeling—the practical tool that turns inspiration into selections.
Same goal as my other homeowner posts: help you hire and plan carefully, whether you work with House Custom Carpentry, LLC or another solid remodeler in Goldsboro, Pikeville, or Eastern NC. Start with how to find a good contractor and construction contract types—then use this guide to get finishes ready to price.
What a remodel vision board is (and what it isn’t)
People use “vision board,” “mood board,” and “selection board” interchangeably. They’re not the same thing—and mixing them up is how projects stall.
| Board type | Purpose | When it helps |
|---|---|---|
| Mood / vision board | Overall look and feel—style words, color temperature, ambiance | Early: concept and inspiration |
| Selection board | Specific products, finishes, and priced options for approval | Mid: after the concept is locked |
| Finish / sample board | Physical samples (cabinet door, slab chip, tile, paint, metal) in your home’s light | Mid–late: before you order |
A mood board answers: How should this feel? A selection board answers: What are we buying? A sample board answers: Does it still look right under our windows and bulbs?
Digital tools make gathering easy. Screens also lie—color, sheen, and scale rarely match what shows up on a phone. Best practice from remodelers and designers who do this for a living: gather and edit digitally, then convert the winners to a physical sample board you live with in the actual rooms at morning, midday, and evening light before anything gets ordered.
A board only becomes useful when it’s edited into something a contractor can price. If it still looks like every pretty kitchen on the internet, it isn’t ready yet.
A clear method homeowners can follow
You don’t need a design degree. You need a sequence.
1. Write the “why” and 3–5 feel words first
Before you save a single image, write down what the room has to do and how it should feel. Examples: “warm, natural, calm, durable.” Or: “bright, clean, easy to wipe down, open sightlines so I can cook while kids do homework.”
Function first. Style words second. Pictures third. That order keeps you from falling in love with a coastal-industrial loft that fights your Eastern NC ranch and your budget.
2. Gather broadly—then separate by room
Save rooms, details, materials, and layouts from more than one source (see the research list below). Use separate boards or folders by room, and optionally by category—cabinets, tile, lighting, flooring. Don’t over-filter on day one. Volume is fine at this stage.
3. Audit for patterns
Scroll fast and list what repeats: warm vs cool palette, wood tone, metal family, light level, layout ideas. Those repeats are your rules. Archive the outliers that belong to a different house personality. You’re extracting a brief—not copying someone else’s kitchen brick for brick.
4. Separate mood pins from product-level pins
- Mood: “I love how this feels”—lighting quality, proportion, vibe.
- Product-level: “this exact shaker door,” “this faucet silhouette,” “this 12×24 porcelain in herringbone.”
Mood pins guide the brief. Product-level pins become priced line items and allowance targets. Mixing them in one unedited pile is why homeowners and builders talk past each other.
5. Edit ruthlessly
Cap the active board. If you’re past roughly 30–40 images, force a cut to the top 10–15 that agree with your feel words. Park the rest on a “maybe later” board so you’re not deleting ideas forever—you’re just keeping the working brief clean.
Aim for one cohesive board per major space, or one whole-home “kit” plus room accents. If the brief is warm traditional, industrial concrete and black pipe don’t belong just because they looked cool at midnight.
6. Translate the board into a contractor brief
This is the step most homeowners skip—and it’s the one that saves money and headaches. Convert repeats into language a remodeler can allowance and bid:
- Mood words + a simple 3–5 color palette (think 60% dominant, 30% secondary, 10% accent)
- Two or three signature materials
- Metal finish hierarchy (one dominant + one supporting)
- Wood undertone family
- Must-haves vs nice-to-haves vs flexible
- Target finish tier per category (stock / semi-custom / custom; a tile $/sq ft range; fixture brand tier)
That’s what becomes a selection schedule—and later, an allowance sheet. (For how allowances and change orders show up in the paperwork, see construction contract types.)
7. Build a physical sample board in the house
Lay flooring, cabinet, counter, tile, paint, and metal samples together in the rooms that will get them. Live with them a few days. Photograph morning, midday, and evening. If two finishes fight in real light, they will fight after install—only then the change order will hurt.
8. Involve your designer/builder at the right time
- Early: share goals and mood boards so the team can filter for structure, code, budget, and Eastern NC climate/resale fit.
- Before demo and before long-lead orders: lock the selection board—cabinets, appliances, fixtures, tile tier, plumbing finish.
- After cabinets are set: slab template and final stone approval.
Finishes are not “the last thing.” Cabinets, appliances, and rough-in-dependent fixtures have to lock early or the schedule (and the walls) pay for the delay.
A simple decision order that reduces overwhelm: appliances → lighting rough-in → cabinets → plumbing → counters → backsplash → decorative lighting → hardware → paint. You don’t have to decide everything on the same Saturday.
Where to research and gather ideas
Use more than one source, and know what each one is good at.
| Source | Best for | Caveats |
|---|---|---|
| Houzz Idea Books | Real remodel photos; style/room filters; pro portfolios | Can skew high-end; hard to reverse-engineer cost |
| Pinterest (carefully) | Fast pattern discovery; mood language | Hides structure, cost, and scope; rabbit holes; wrong product IDs |
| Instagram (showrooms, designers, manufacturers) | Current pairings and install details | Trend-heavy; hard to verify quality |
| Shelter magazines & editorial sites (AD, Livingetc, BHG, Apartment Therapy) | Cohesion examples; process articles | Often furniture-forward; not always remodel-cost realistic |
| NKBA / trade education | Kitchen & bath lighting and process standards | Some content is member-gated |
| Manufacturer education (paint, plumbing, tile, waterproofing, cabinets) | Technical truth on sheens, durability, configs | Brand-biased—still useful |
| Local showrooms | Touch finishes; lead times; coordinated collections | Stock bias; pressure to decide on the spot |
| Stone / material yards | Full slabs; movement and seams | Overwhelming without a shortlist; yard light ≠ home light |
| Model homes / open houses | How finishes read at real scale | Spec-house trends may not match older Eastern NC stock |
| Sample boards in your home | Final truth for undertone and sheen | Requires discipline before ordering |
Screens are for gathering. Your living room at 7 p.m. is for deciding.
Coordinating design elements so the house feels intentional
A vision board without coordination rules becomes a pile of nice things that don’t belong together. Here’s the practical version we use when homeowners are selecting finishes.
Undertones and color temperature
Commit to a dominant direction home-wide: warm (honey oak, cream quartz, aged brass, soft white) or cool (gray LVP, cool white quartz, nickel/chrome, crisp white). Mixed systems can work with a skilled designer; most homeowners get cleaner results staying in one family.
Warm whites with warm woods and brass. Cool whites with cool grays and nickel. Mixing warm and cool whites in the same sightline usually reads “off.” Test large paint samples on the wall under the bulbs you’ll actually install—Kelvin matters.
Metals
Choose one dominant metal and one supporting. A third only sparingly. Keep plumbing fixtures consistent within a room (faucet, shower trim, tub filler as a family). Vary metals through hardware, lighting, mirrors, and accessories—and repeat each finish at least twice so it looks intentional.
Near-miss finishes—satin brass next to a different polished brass—look like mistakes, not design. Stainless appliances count as a cool metal in the kitchen; plan for them. Cross-brand “brushed nickel” finishes are comparable, not identical—sample in person.
Wood tones
Match undertone, vary lightness and grain. Warm walnut with warm oak reads intentional. Warm cherry next to cool gray-washed oak usually clashes. Note species, stain, and sheen on a finish schedule—matte floors and high-gloss islands can fight if you don’t plan it.
Texture, hero, and supporting cast
Pick one statement material per room—a dramatic slab, patterned floor, or bold island color—and keep the rest quieter. Balance smooth surfaces (quartz, painted cabinets) with tactile ones (wood grain, textured tile, woven textiles). Large-format tile and busy veining need calm companions.
Lighting layers
Plan three layers: ambient (recessed/general), task (under-cabinet, vanity side lighting, pendants over work), and accent (in-cabinet, toe-kick, cove, decorative). Residential kitchens often feel best around warm Kelvin with high CRI so materials look true. Prefer continuous under-cabinet LED strips over puck lights. At the vanity, sconces at face height beat a single overhead that casts shadows. Dim each layer independently—and lock fixture locations before walls close even if the decorative fixtures come later.
Continuity between rooms
Open-plan kitchen–living–dining is one visual field. Select it as a system. Continuous flooring through public zones; related (not identical) flooring in baths and laundry with planned transitions. One trim package home-wide as the architectural backdrop. Echo metals and wood undertones room to room; put personality in paint and accent tile.
Eastern NC notes (timeless over trendy)
For Goldsboro, Pikeville, and nearby Eastern NC homes, I nudge clients toward finishes that age well: warm neutrals, soft greige, muted sage or blue accents, and natural wood—over highly themed nautical kitsch or ultra-trend permanent colors. Put personality in paint, lighting, hardware, and décor. Keep hard-to-change surfaces more classic: cabinets, flooring, counters, large tile fields.
Humidity and durability matter here. Prioritize moisture-smart flooring in wet zones, solid ventilation, and corrosion-aware choices on coastal-influenced sites. Universal-design details—comfort-height toilets, grab-bar blocking, low-threshold showers, wider clearances—add livability and resale without looking institutional when they’re detailed well.
Avoid gray-on-gray cool stacks that fight the warm hardwoods common in this region, and avoid locking the house into one fashion cycle with ultra-busy permanent patterns. Pair this with the habits in our home maintenance guide so finishes stay looking like the board after install day.
Use the finish checklists—that’s the practical tool
Inspiration without a decision list turns into late change orders. We’ve put together branded printable finish checklists for:
- Kitchen — layout anchors, appliances, cabinets, hardware, counters, backsplash, sink/faucet, flooring, lighting, paint
- Bathroom — scope, waterproofing outcomes, tile, vanity, tub/shower trim, toilet, ventilation, lighting, accessories
- General remodeling — whole-home design system, flooring continuity, trim, doors, hardware, paint, lighting, windows, stairs, laundry/mudroom, exterior for additions
Each checklist uses simple checkbox columns for selected / undecided / allowance TBD. These aren’t a contract. They’re a working tool that feeds the allowance sheet and material specs once you and your remodeler confirm selections in writing.
Download the packet and fill it alongside your vision board. Bring both to your selection meeting. That’s how “we like this vibe” becomes “order these cabinets.”
When to call us
If you’re in Goldsboro, Pikeville, or Eastern NC and you’re past the “pretty pictures” stage—or stuck in it—bring your mood board and goals to a conversation before you order anything. We are a licensed design/build remodeler (NC# 82521). We use Chief Architect with 3D so you can see the space before we build it, and we run a lead-carpenter model so the person planning the finishes stays connected to the people building them. We use NAHB Residential Construction Performance Guidelines as our objective yardstick for how work should perform.
I’m not asking you to hire us from a blog post. I’m asking you to get the vision board and finish list into shape before someone starts tearing out your kitchen. If you want help turning that board into a buildable plan, call (919) 949-6846 or visit housecc.ltd. Letterhead / shop: 1049 Gurley Dairy Rd, Pikeville, NC 27863.
— Dylan House
NC General Contractor #82521
House Custom Carpentry, LLC
Related reading
- How to find a good contractor →
Reputation, who shows up on site, design/build, scope, payments, and insurance—before you hand anyone a finish list.
- Construction contract types →
Lump sum, cost-plus, GMP, and T&M—so allowances and change orders from your selections land in the right paperwork.
- Home maintenance guide →
Keep finishes performing after install—painting, openings, inspections, and energy habits for Eastern NC homes.